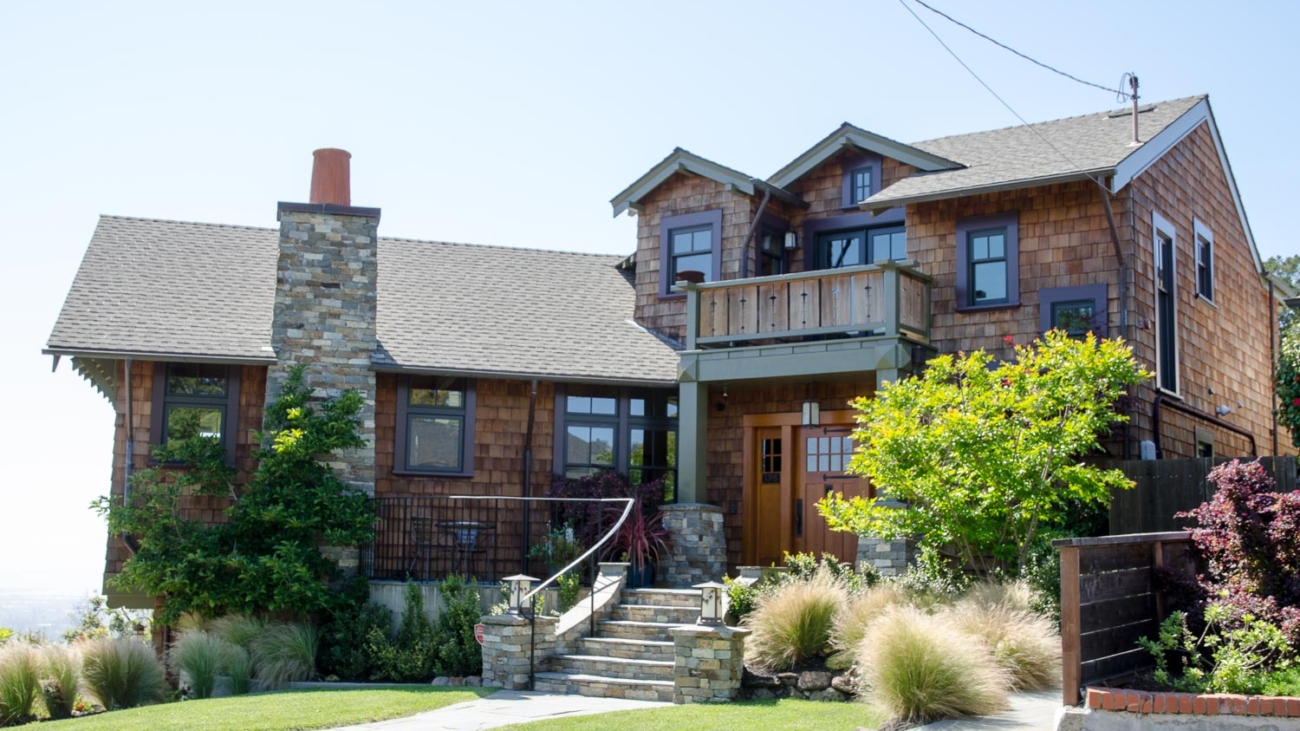
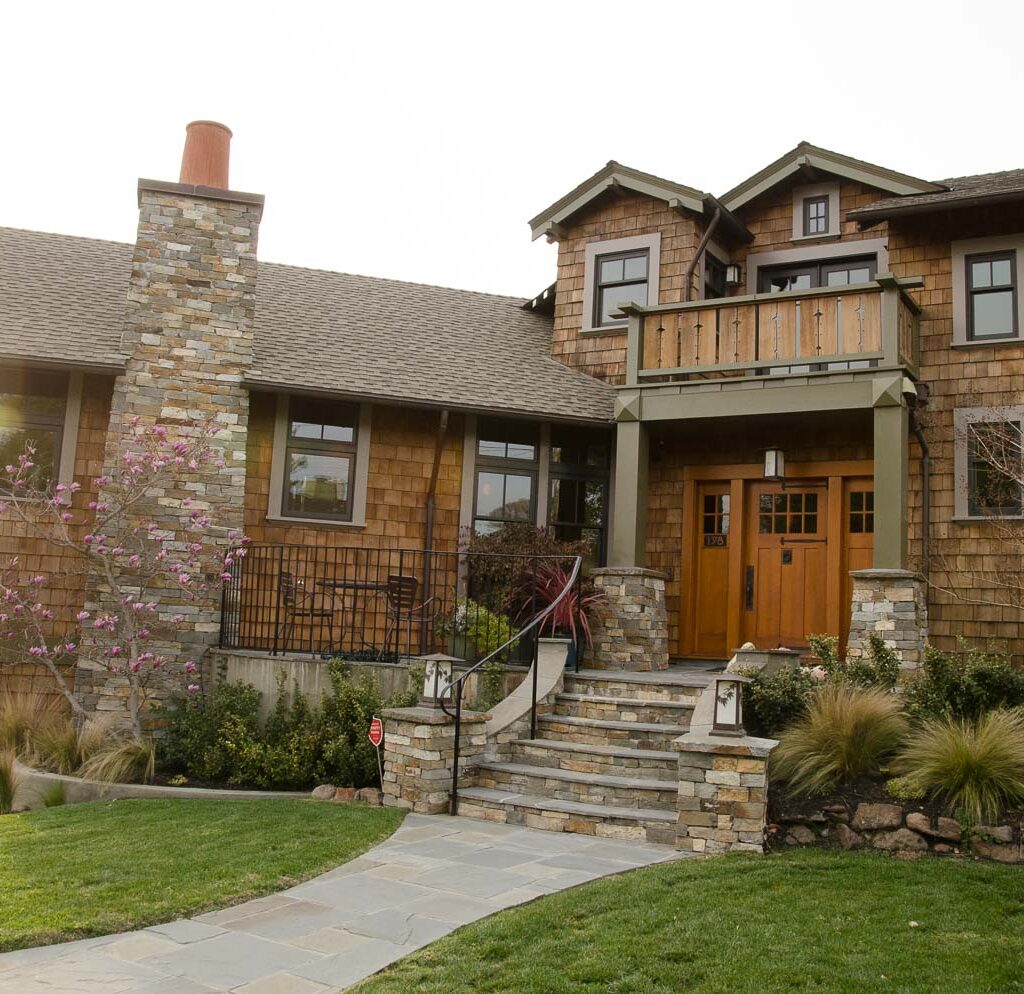
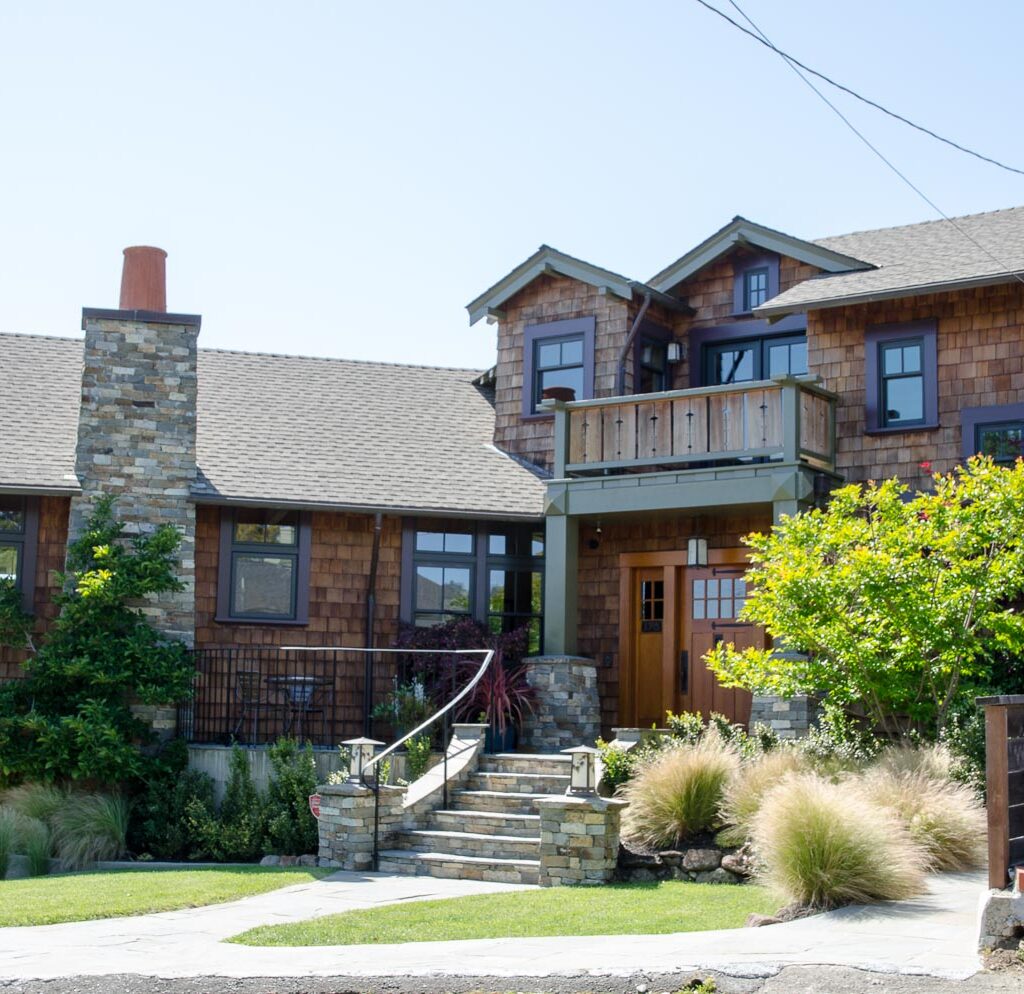
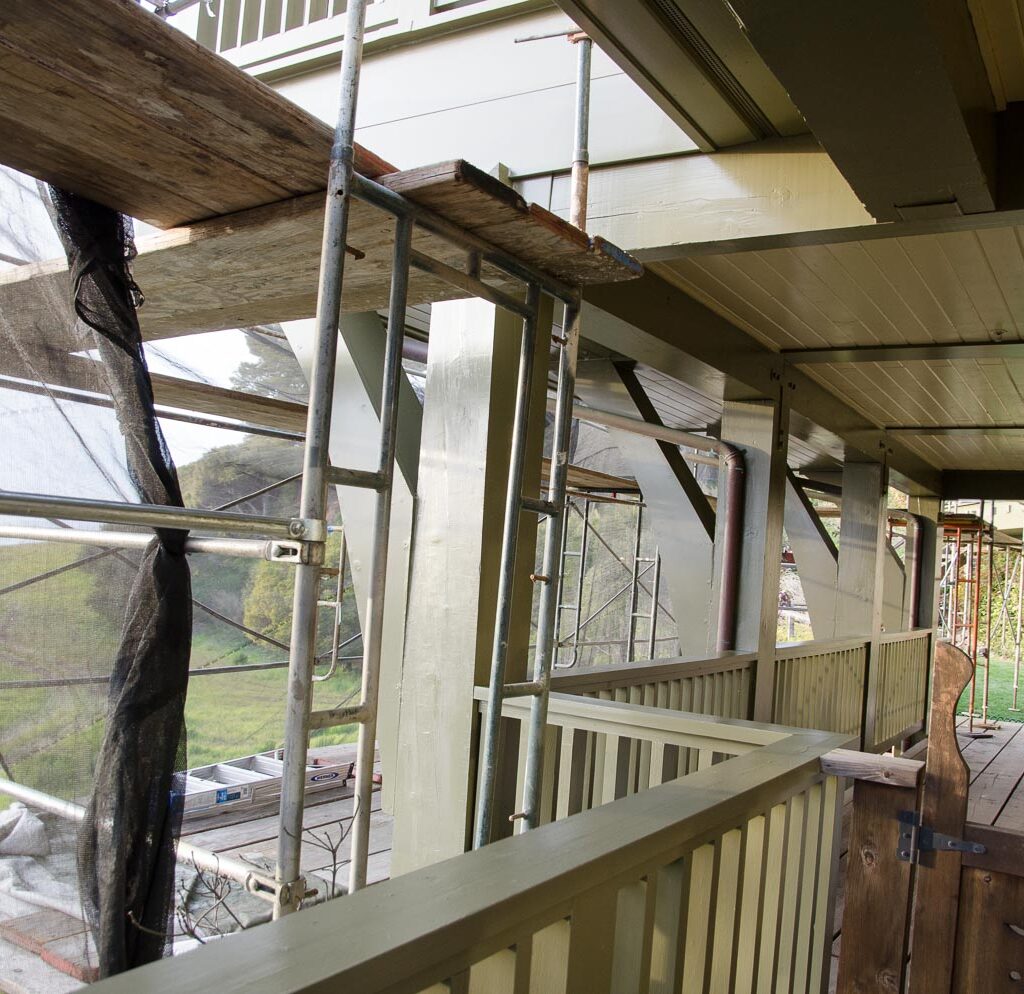
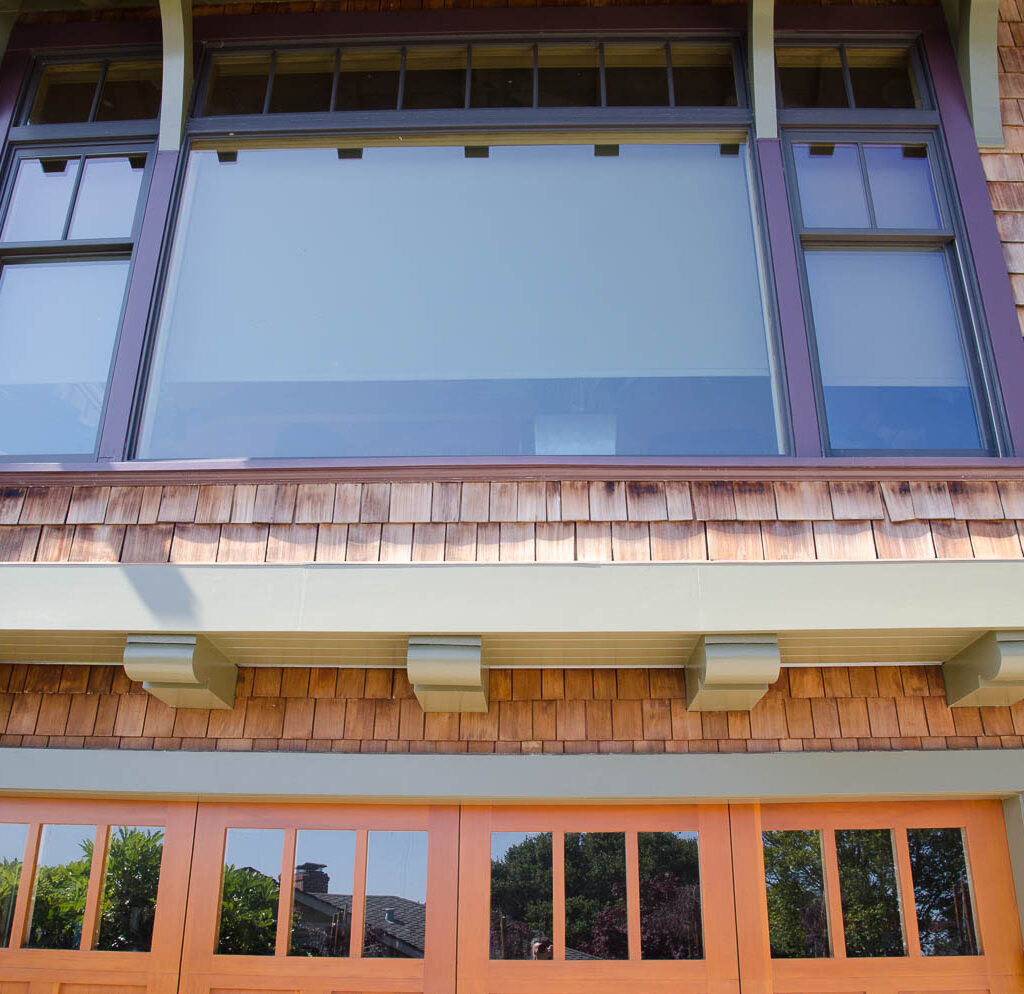
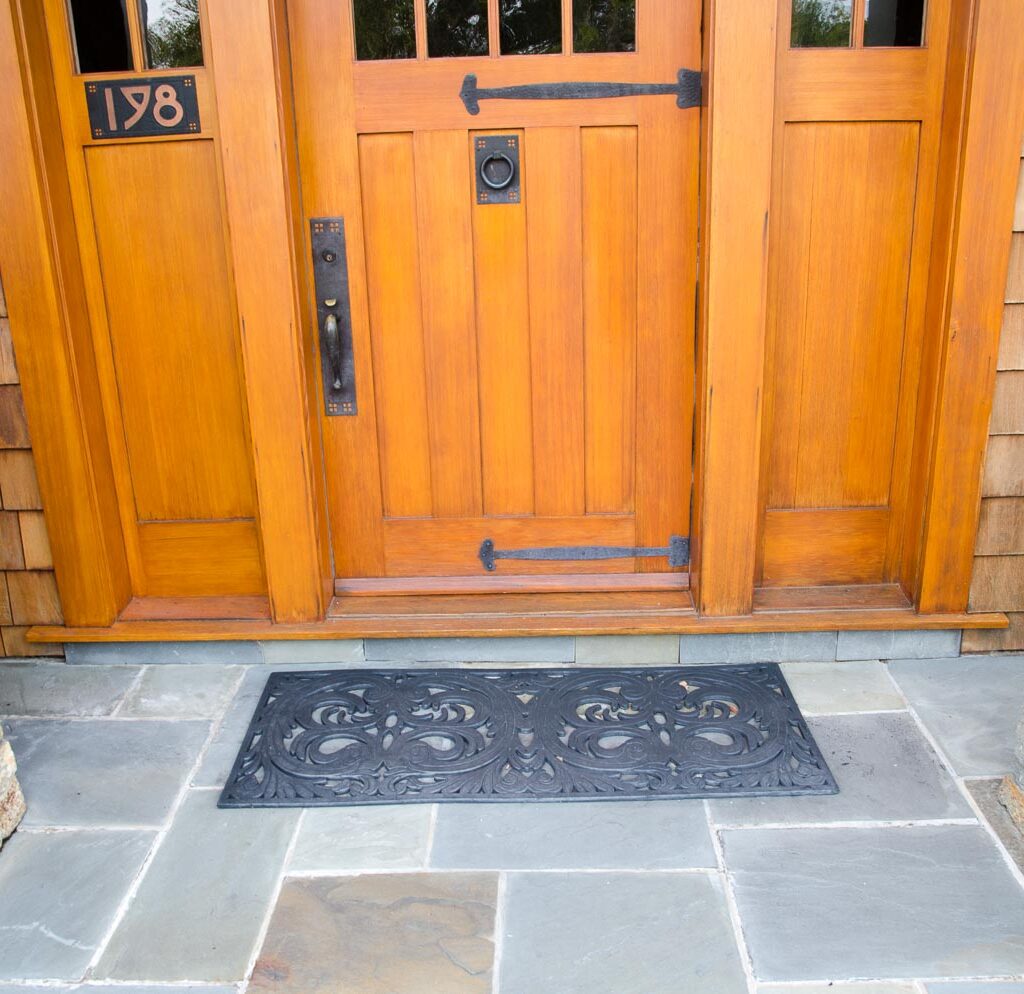
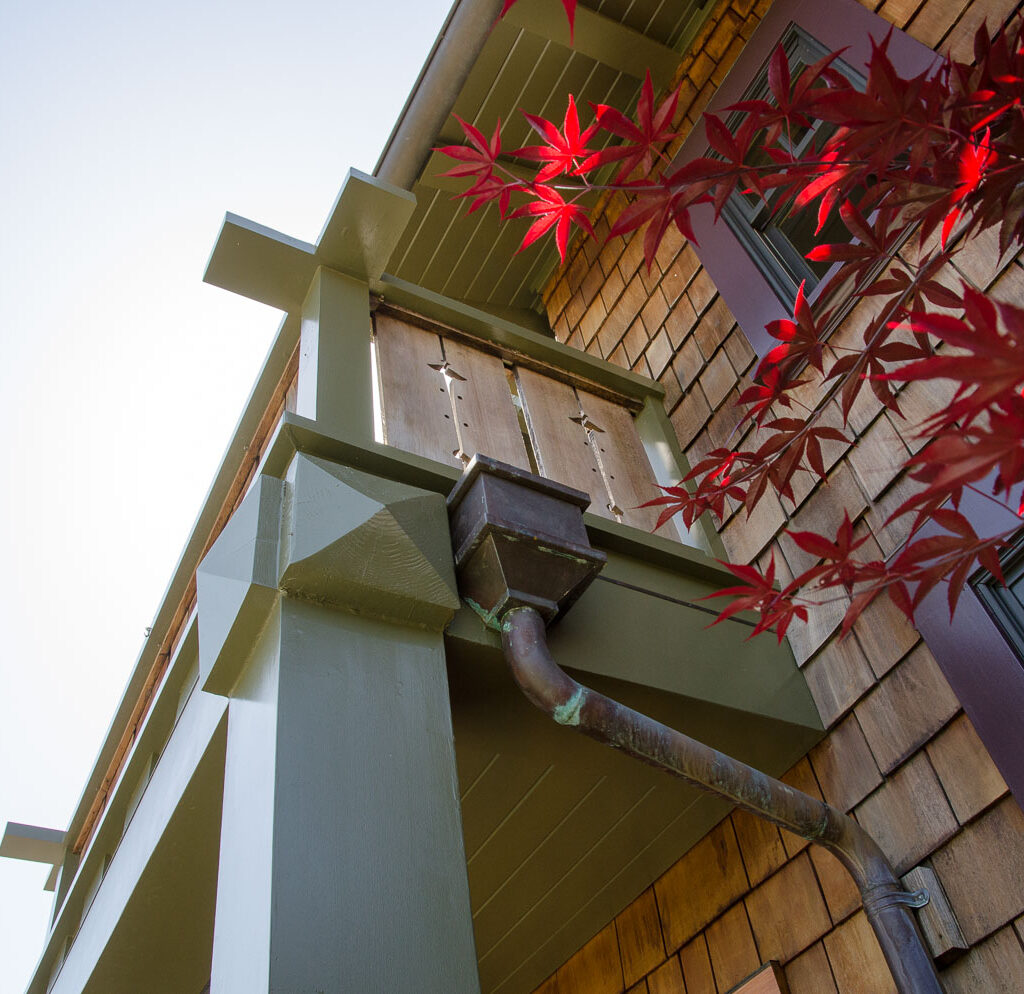
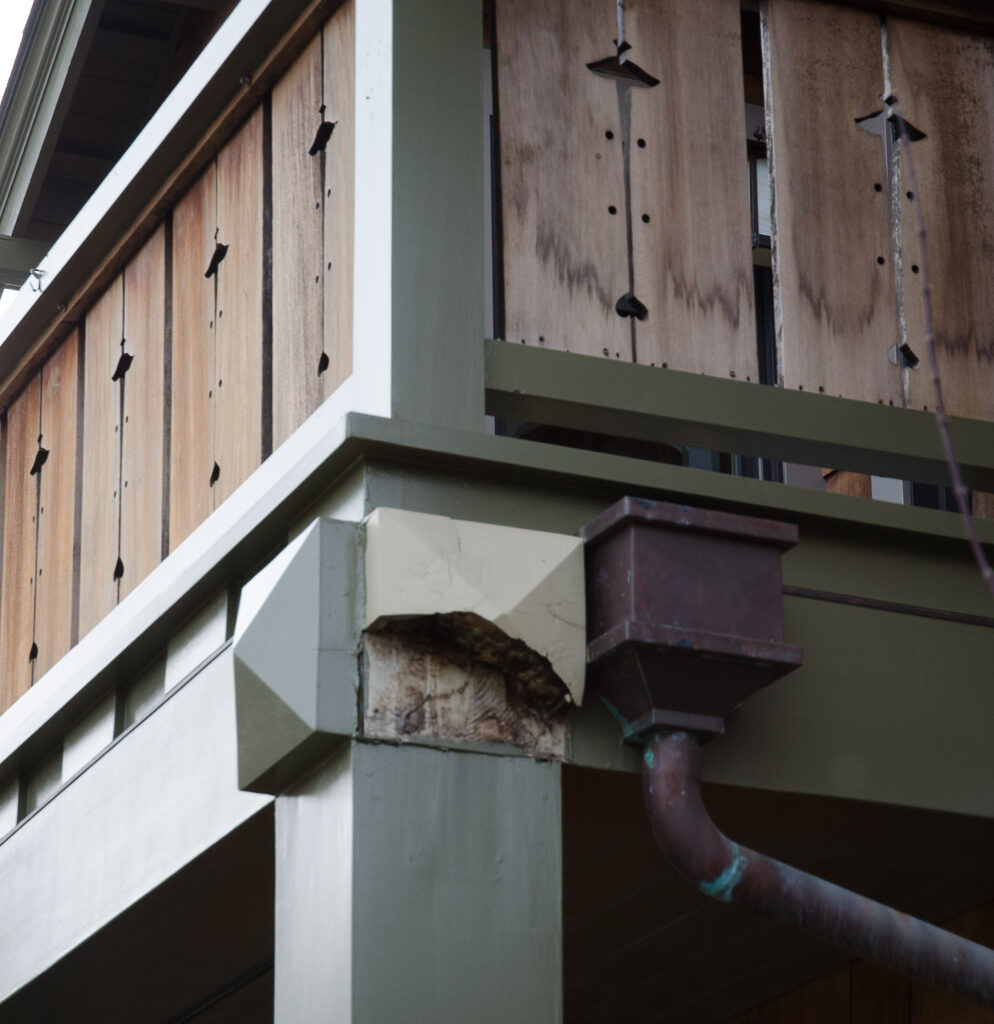
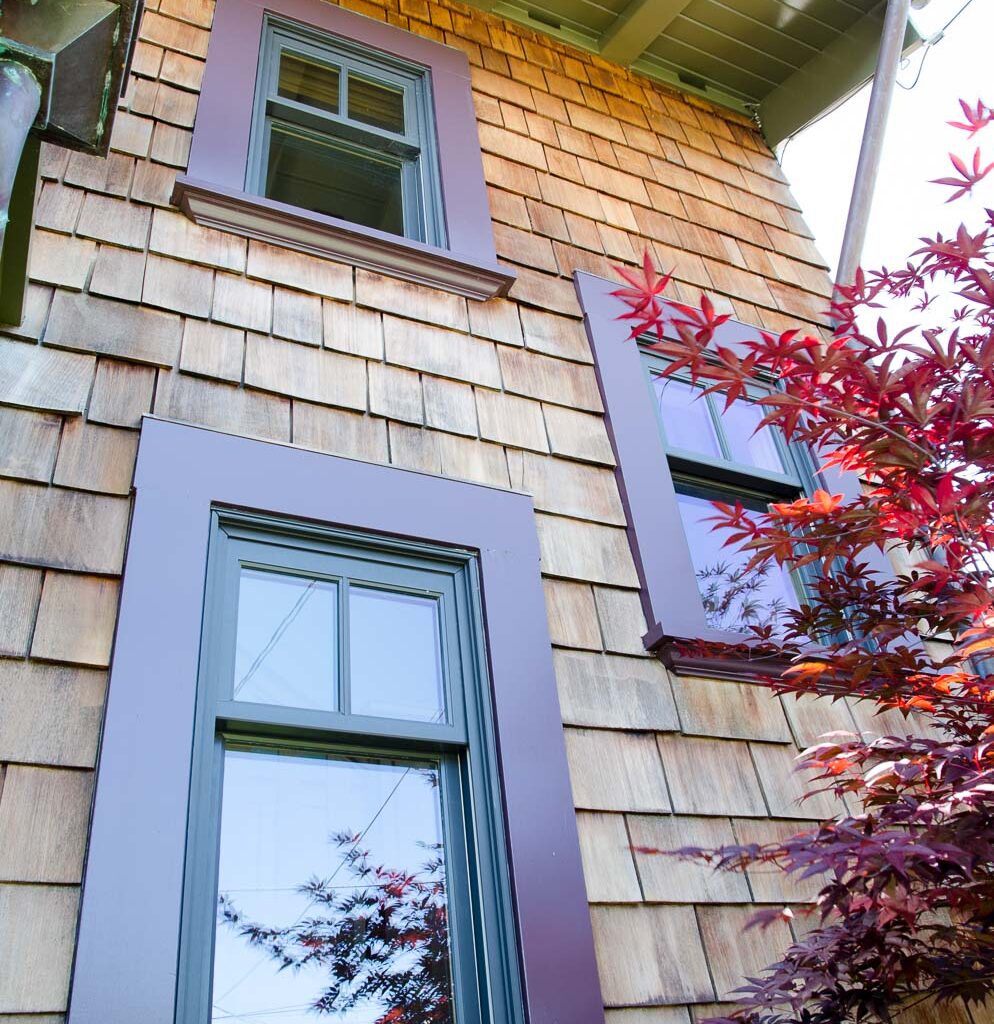
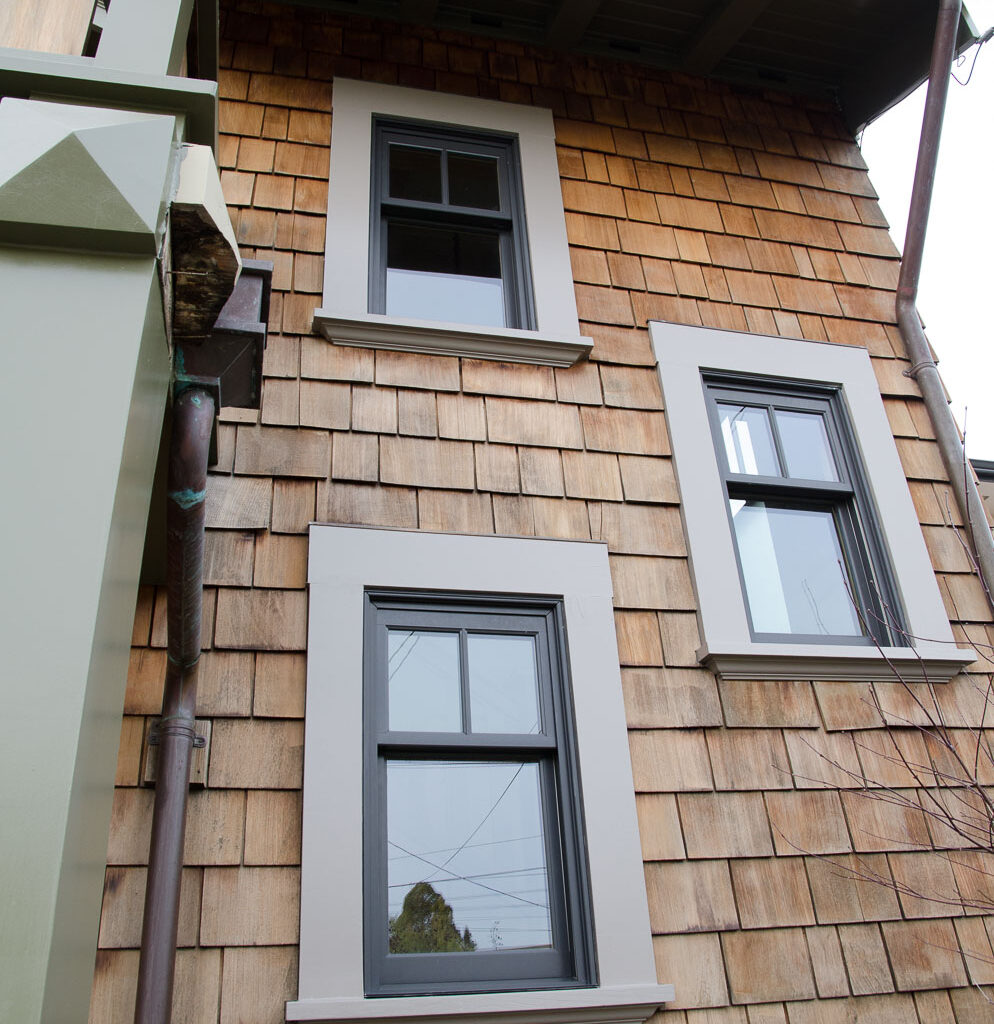
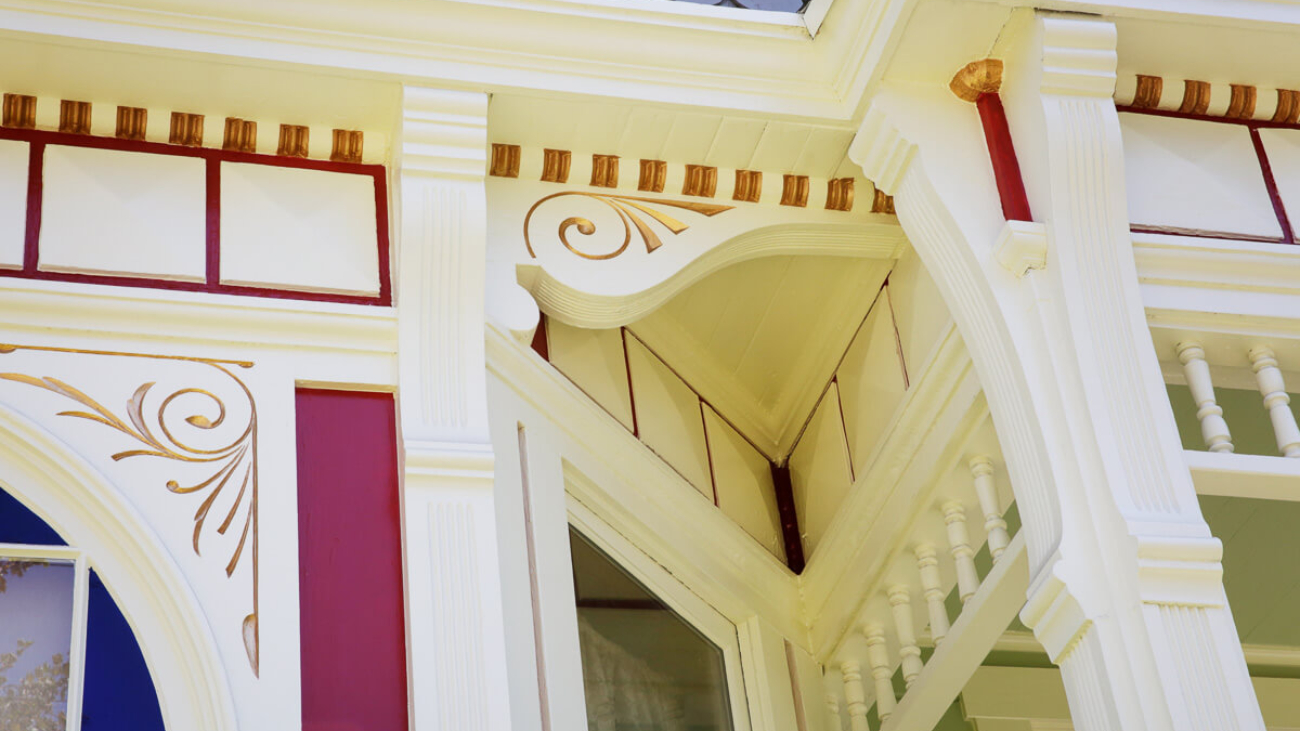
A repeat-client for Arana! This client purchased a new home in Piedmont and called us in to do some restoration and repair on the front door frame and period details on the wood balcony/decking.
We applied a clear product to the shingles that both protects against moisture intrusion or damage, and is flame retardant. We applied a protective and beautifying varnish to the doors, and the gorgeous wine-purple paint color the client selected that transformed the window frames and brought out the beauty of the home as a whole.
As painting contractors, we at Arana are very attuned to the needs of the homeowners we serve, and the desire that many people have these days to be more “green” when it comes to certain products, processes, and material choices. One example is the increasing appeal and popularity of solar. In our position, we look at solar from a purely logistical perspective. In the order of operations, if you are thinking of adding solar to your roof, you would do that before hiring us to do an all-over exterior paint job, and after any repairs or roof replacement that your roof might need.
But, when the state of California recently announced that all cars must be electric-powered by 2035, we became intensely interested in the subject! In general, we agree that “green” is good. And overall, solar is good. However, we noticed that the recent announcement brought into focus for us certain questions like: Is the transition to solar truly as green as it intends to be? What is the intent vs. the impact of changing over to green technologies? And who actually gets to take advantage of green technologies and practices?
If there is a transition from gas powered cars to electric, by association, it seems clear that there needs to be a transition to alternative power sources, like solar, to further reduce reliance on fossil fuels. From our perspective, it is interesting to consider that a push for electric cars and solar to support that would also place more “power” in individuals’ reach, decentralizing energy production and control.
That then points to the question of equitable access to energy. The recent heatwave further highlighted serious concerns about the reliability of the grid overall when in the same breath, while stating the intention for all of us to go all electric, the state then asked residents to refrain from charging their electric cars at home so as not to strain the grid!
So, in 2035 California, if you have an electric car AND solar, you might be okay? If not, you might be staying home that day from work?
Having had personal experience with solar over the past two years in a rural area prone to grid disruption, Ernesto and I have our own opinions on whether the solar industry needs more time to mature before it can be a dependable and affordable source of energy for all. In addition, there are the potential social and environmental impacts relating to the mining of lithium required for batteries, which also leads to inconsistent supply; plus many more skilled contractors and reliable parts suppliers and manufacturers are going to be needed to support the increasing demand.
(See our blog article “Bay Areas Schools Train Next Gen Tradespeople“ for further discussion regarding the challenges of increasing the base of available and competent contractors.)
For an in-depth look at the ins-and-outs of solar, and to explore some of the complex questions that arise around this topic such as equitable access and long-range viability, we interviewed our colleague, Ben Giustino, a licensed general contractor and solar installation expert with A1 Sun (a1suninc.com). Ben has 15 years of experience working in solar power and energy storage, working alongside his parents since the founding of the Company in 2007.
The family’s interest in solar power traces back to Ben’s father, Larry Giustino’s childhood. Larry manufactured a photovoltaic cell through a Bell Telephone Lab school program in San Diego in elementary school at age 11 — and his experience continued through designing solar and thermal systems in the 1970s and 80s, and on to the 2000s. Ben and his family’s passion for and knowledge of the solar industry make them an ideal resource for our customers and we are excited to share this interview with you.
What is your process for advising a homeowner on how big/what capacity system they will need? What are the pros and cons?
An average 2,000 square foot home uses around 6,600kWh/year. If you have a South-facing roof, free of shading, that would be a roughly 4kW solar array. However every home is unique. In other words, two identical houses could have completely different consumption rates based on occupancy and how that individual (or family) uses electricity. We size systems for homes based on consumption, roof space, and budget.
The cost of installing solar essentially is you prepaying for all of the electricity your new system will produce over its whole usable lifetime. Solar is expensive up front. You want to make sure you have a design that works for you. You also want to make sure you get a good installer that will be there to service the system.
How do factors such as pitch of roof, presence of trees, direction it faces, determine if someone can use solar power?
For a good installation, you have to take into consideration anything that is important to the homeowner, plus site challenges or constraints. In certain situations, solar is not a good idea. The main reason you wouldn’t want to install solar is if there is no access to sun. The more sun on your roof, the better the power production and the cost-effectiveness of solar. As long as you have sun, solar makes sense at any scale. With access to sun, you can produce enough power to operate a single cell phone, to a single residence, to an apartment complex, to an entire city.
In order to have access to power at night, you will need to pair solar with storage and/or other forms of generation.
People should be aware that an old roof that needs to be replaced, old electrical that needs to be upgraded, a difficult site, a steep roof, lots of shading, etc., all affect how expensive it is to install a system and/or how quickly a system pays back.
One thing I would advise is to never think you should install solar on a roof that needs to be replaced. You really want to install a system and then maintain it for as long as you can. The longer your system operates, the less expensive it is to produce each kWh of energy. Let me repeat that for the people in the back, The longer your system is in operation, the less expensive each kWh of produced energy gets.
A cool thing to look for will be vehicle to home or vehicle to grid. This is where not only can you use the solar to charge your car, you can also use the car to power your home or offset peak demand on the grid in the evening. This is possible, but still just in its infancy. It will be a few years before code, vehicles, and technology are aligned. Currently, it’s awesome just to be able to charge your car from solar.
How does becoming energy-independent work? Self-supply electricity at home, with a battery?
Since this is a newsletter focused on homeowners, and residential solar and storage is what I do, I’ll stick with homes as the scale to focus on. But really, since solar is scalable, what I’m saying about homes can be scaled up as big as you want to go (*with some serious details to take into account) or down to powering a calculator.
So there are essentially three ways to generate and/or store electricity in a home. These can be mixed and matched:
A. Solar that is grid tied with no battery
This is the majority of solar systems you see in your neighborhood today. During the day you produce power. You export the energy you don’t use on site to the grid. Those kWh are banked at the rate exported by the utility, who sells it to your neighbors. Then at night, you consume power, which the utility adds to your bill. At the end of the year the utility gives you a yearly “True Up” bill where they either bill you for net usage or give you a credit for over consumption (at wholesale). This explanation is an oversimplification of NEM which are the interconnection rules for generation facilities.
Grid-tied-no-battery is actually the most cost effective way to have solar on your home. It is also the most environmentally friendly way to have solar, because it uses less components, meaning it takes up less raw materials, less carbon emissions from shipping from the manufacturer, etc.
B. Solar with battery which is also grid tied
All of the NEM rules still apply with imports and exports of kWh, but what happens when you have batteries is that you store your energy and use it on site, rather than exporting and importing from the utility.
This has some financial return, but it does not currently improve ROI because of the cost of the batteries. The real reason to have batteries is if you need power when the grid goes down.
Currently the reasons I would advise batteries is if:
You rely on a medical device that needs access to power during a blackout
Loss of power would lead to financial losses, such as with a home-based business, which would offset the cost to install
If you just really want batteries
If the current cost to install batteries is insignificant to you
If you are prepping for complete collapse of the grid — in which case, make sure you prep other things like food, water, bow and arrows for the zombies…
OK, joking about the zombies. But, if you can’t say yes to any of the rest of those bullet points, my suggestion would be to wait on batteries.
As technologies continue to evolve in the industry, batteries will get better than what we have now; there will be more options that will be more capable, and hopefully cheaper, in the future.
You can always retrofit an existing grid tied solar array with batteries later.
Taking your system off grid is possible with batteries, however, you either want to slim down what you are trying to back-up or supersize your solar and battery — and get ready to fight PG&E. It is theoretically legal in California to leave the grid entirely; however current building code requirements include connection, meaning that homeowners are unlikely to get cleared for it.
C. Generator
You can also leave the grid by relying on a generator — by itself, or paired with battery back-up and solar. Currently powering a generator means relying on gas or diesel, but as time goes on, who knows? The downside of generators is that they are noisy, need refueling, need maintenance to operate, and typically are only used in outages.
What else do you want our readers to know about switching to solar?
Being able to produce and store your own electricity allows you to be potentially more self reliant. Right now it makes sense to get solar because you get good interconnection rules, it creates an eventually carbon negative generation source, and it helps to push California/USA/the world’s generation towards renewable electricity generation.
Now or later, you can add storage. Lithium based batteries are finally at scale, meaning they are relatively affordable with less maintenance required (as compared to Lead Acid batteries). They also allow you to store your cleanly generated power and use it on site. Batteries also can be used to help reduce peak evening demand on the grid, as your system will likely be exporting power to your neighbors in the evening.
However, batteries will get better. I’m hopeful for more environmentally-friendly batteries. My personal favorite (which is a viable option now) is Saltwater batteries. In theory, they are great for stationary applications, pose no fire danger, rely on plentiful ingredients, are relatively benign, and are reusable/recyclable. However, they are limited in how much energy they can store and deliver, compared to other battery types, are larger in size, and cost is still fairly prohibitive. We will see, as time goes on, how this technology evolves.
How does individual homes switching to solar impact the larger community? The environment?
Solar in general is beautiful. Producing Electricity from the sun. Solar on homes is practical. You are making something you need right on site where you need it. Storage makes sense because then you can store energy for when you need it. Solar and Energy Storage as an industry also creates good-paying local careers world-wide, and hopefully more domestic manufacturing jobs, as the industry grows.
The more solar that is installed, the greener the energy mix on the grid is during the day. While solar does take natural resources to create, the longer it is in use, the more CO2 emissions it offsets. In reality, solar panels can last for 50+ years. I’ve seen panels from the 70s still in use on an off-grid home in Northern California. If you charge your car from your solar, you reduce the footprint of having a car, which is still not insignificant, but every bit of reduction is good.
How do we (as responsible members of our local communities) make solar generated power more available to those who cannot afford to put a system on their roof? To renters?
There are many options here. The biggest pathway to making solar more accessible would be to have the apartment complexes or communities join together to install one shared system, with renters or lower-income homeowners having the option to buy into that system.
The larger the system, the lower the cost-per-watt to install, the more people that start-up cost is divided between, the cheaper your electricity gets. In the industry, this is known as “Community Solar.” Community Solar, also called “Shared Solar,” is essentially a private enterprise, multi-owner-collective, or government entity building a micro-grid — and PG&E does not like that.
To learn more about this issue of unequal access and possible solutions, visit:
Currently, Yes. And at rates that make it practical to make the investment and have it payback in a reasonable amount of time.
Is solar getting cheaper as the industry evolves?
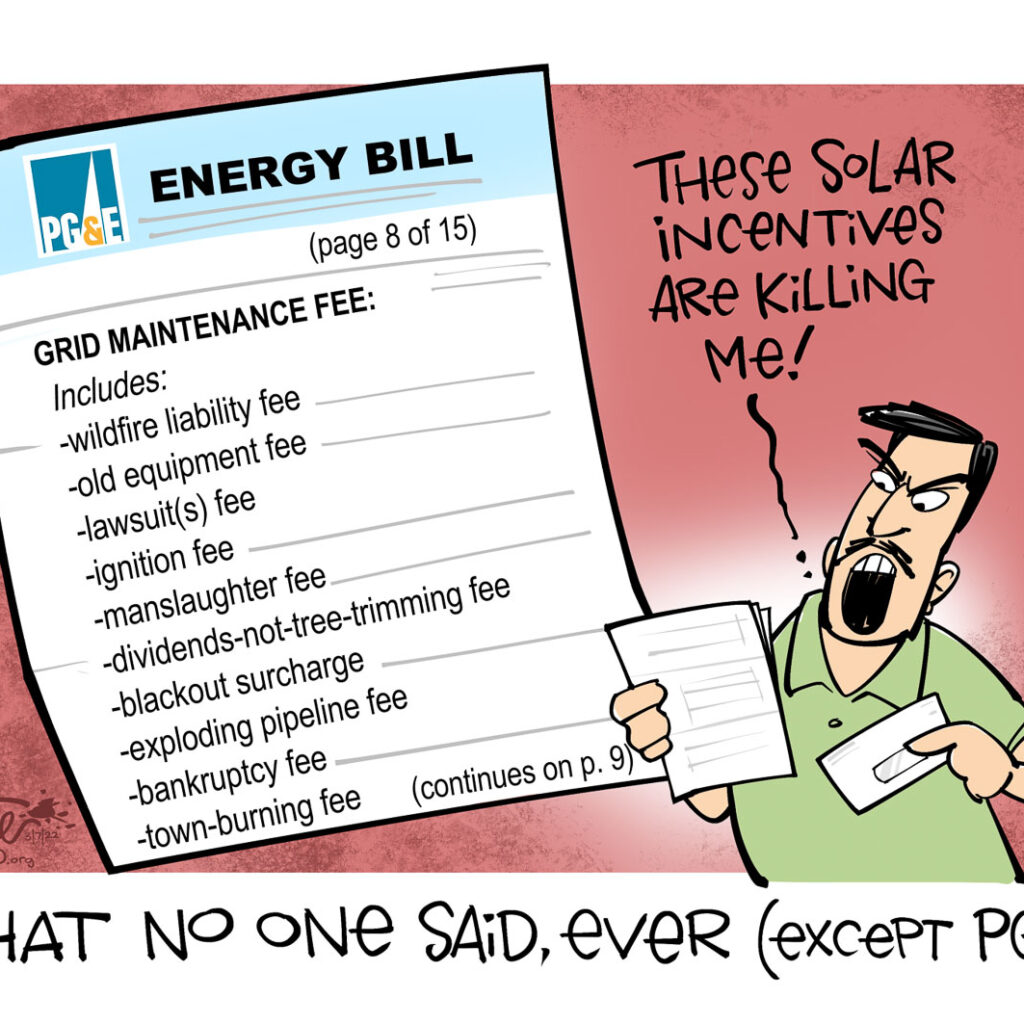
Yes and no. Over the past 15 years, solar has gotten less expensive to install. Panels are less expensive, equipment is better, and companies can generally do it better and/or faster. But the utilities companies don’t like Solar. Solar impacts their profit margins. Thus, they work to make it more difficult/expensive to install with added bureaucracy, rules, fees, etc.. Utility companies are actively trying to undermine the financial value of producing your own power.
So, while solar has gotten cheaper, utility companies are actively doing what they can to reestablish monopoly. NEM 3.0 (a revised “Net Energy Metership” policy) is their all-out attack on distributed renewables, a.k.a. rooftop solar, and this proposal is currently being debated by the California Public Utilities Commission.
If you want to get involved with advocating for your right to have and benefit from solar, visit: solarrights.org
Does a solar system have to be replaced/updated every 10 or 20 years?
Depending on how well-sized, designed, installed, and maintained it is, a modern solar system can operate well beyond the 25 years the modules and inverters are warranted for. Systems can also be updated over time with more panels, batteries, car chargers, home automation, etc.
The only part of the system that will need to be replaced over decades of use should be the inverters. Given the quality of current materials on the market, and if your system is well-installed, you should be able to use the panels and hardware/wiring/etc. for the next 50 years, or at least, in my mind, that is the hope.
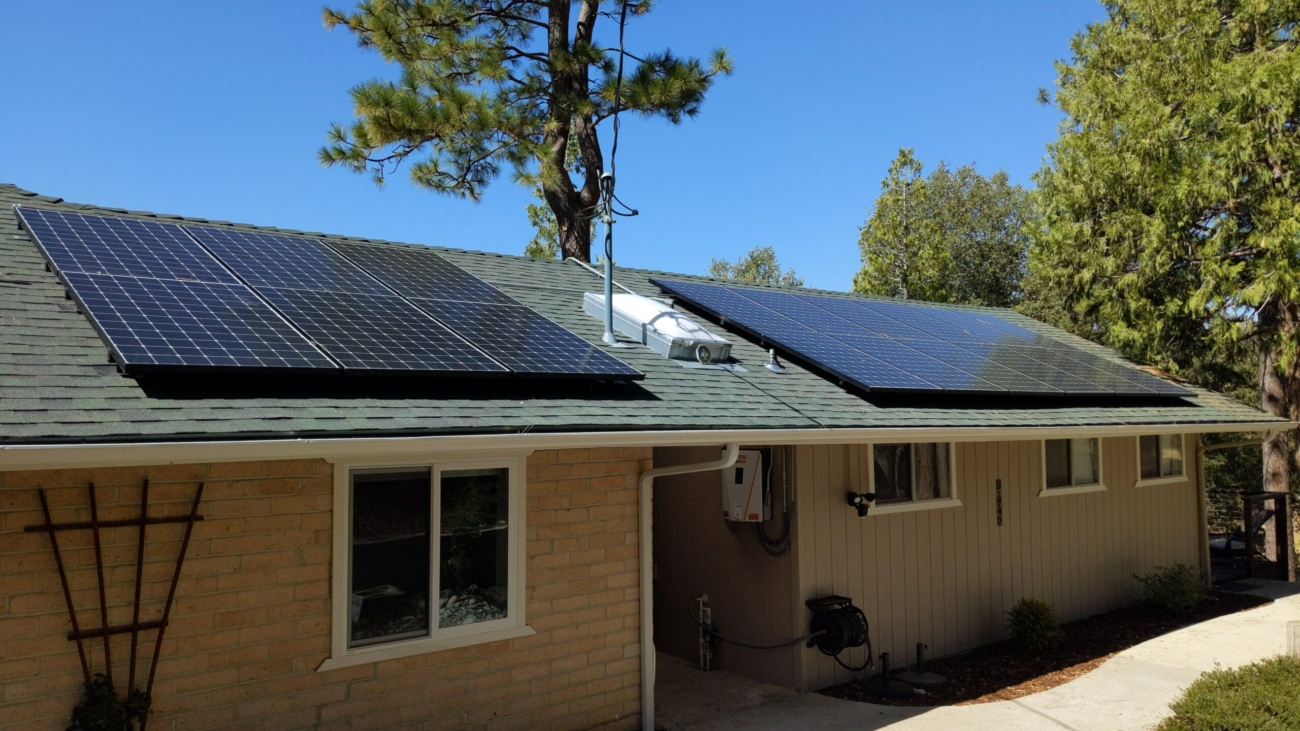
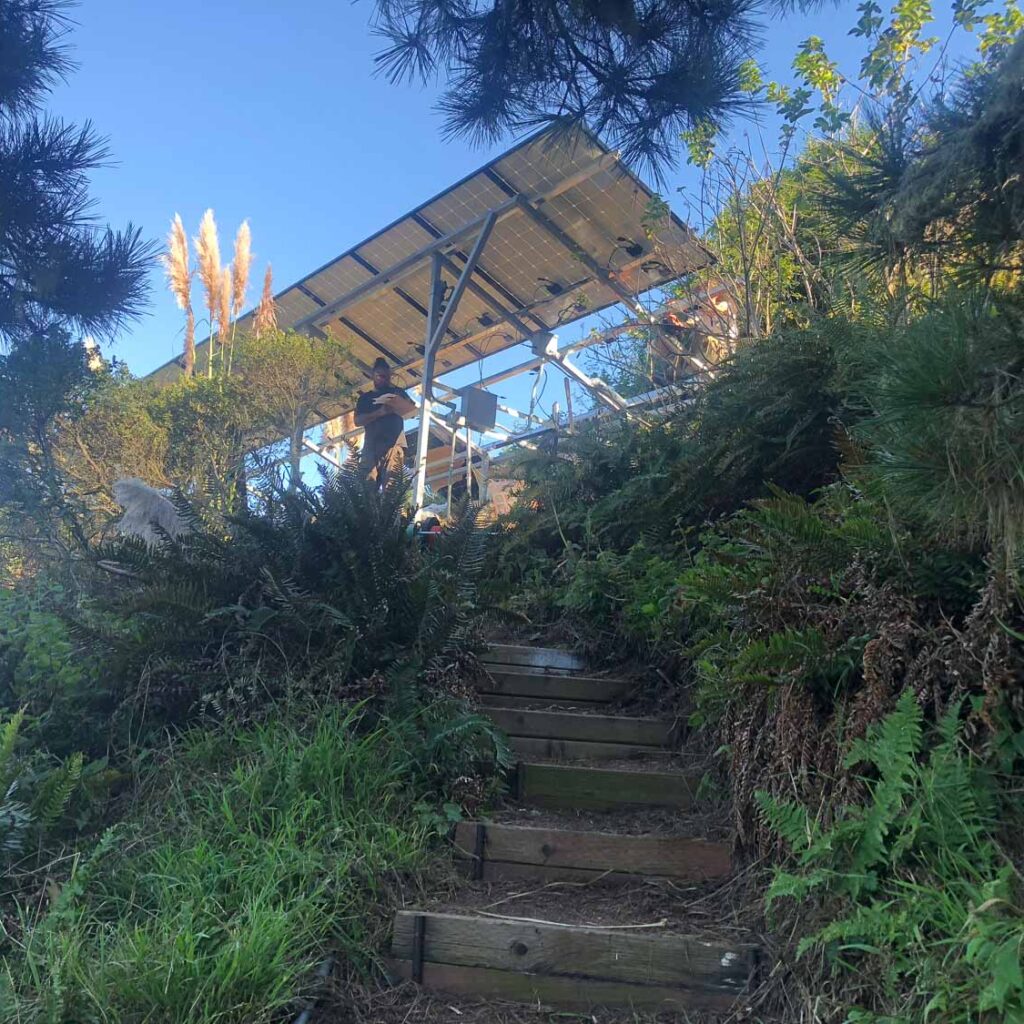
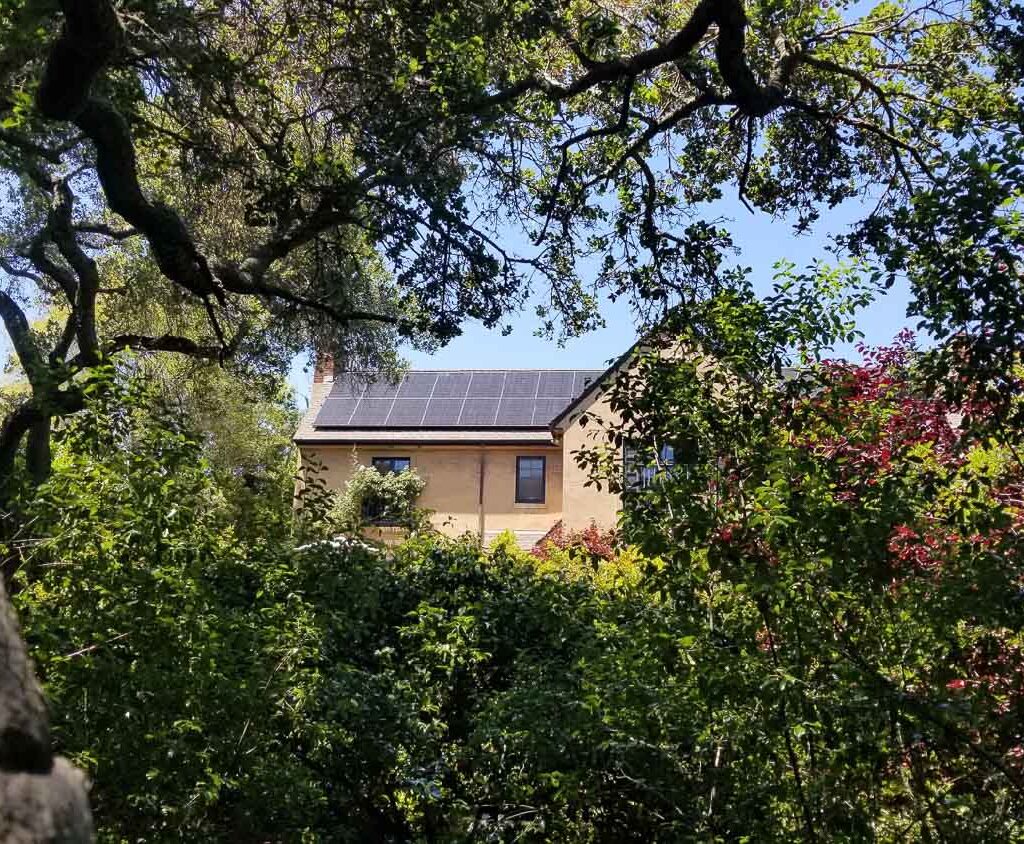
All photos in this article provided by A-1 Sun, except for the featured/top image.
Got Home? We’ve Got an Exterior Paint Process For It
The Bay Area sings in a chorus of varied genres of architecture. From Eichlers and Craftsman Bungalows to ornate Victorians, robust Colonials, and magical Storybook houses, each genre is unique. What makes a style remarkable is in part how it features a specific set of materials. Arana views any home we are invited to work with as a treasure. We combine artistry with craftsman utility to not only beautify but also to protect the home for the long term.
While many houses in the Bay Area are around 70-to-100 years old or more, that timeline is nothing compared to the thousands of years that castles built in Europe have stood. Coming in somewhere between that kind of longevity and what is available to us if we are thoughtful and caring with the tools and materials available to us today, we present this article describing how we handle the types of exteriors that make up the majority of homes of The Peoples of the Bay Area: Stucco, Shingle, Siding, and Brick.
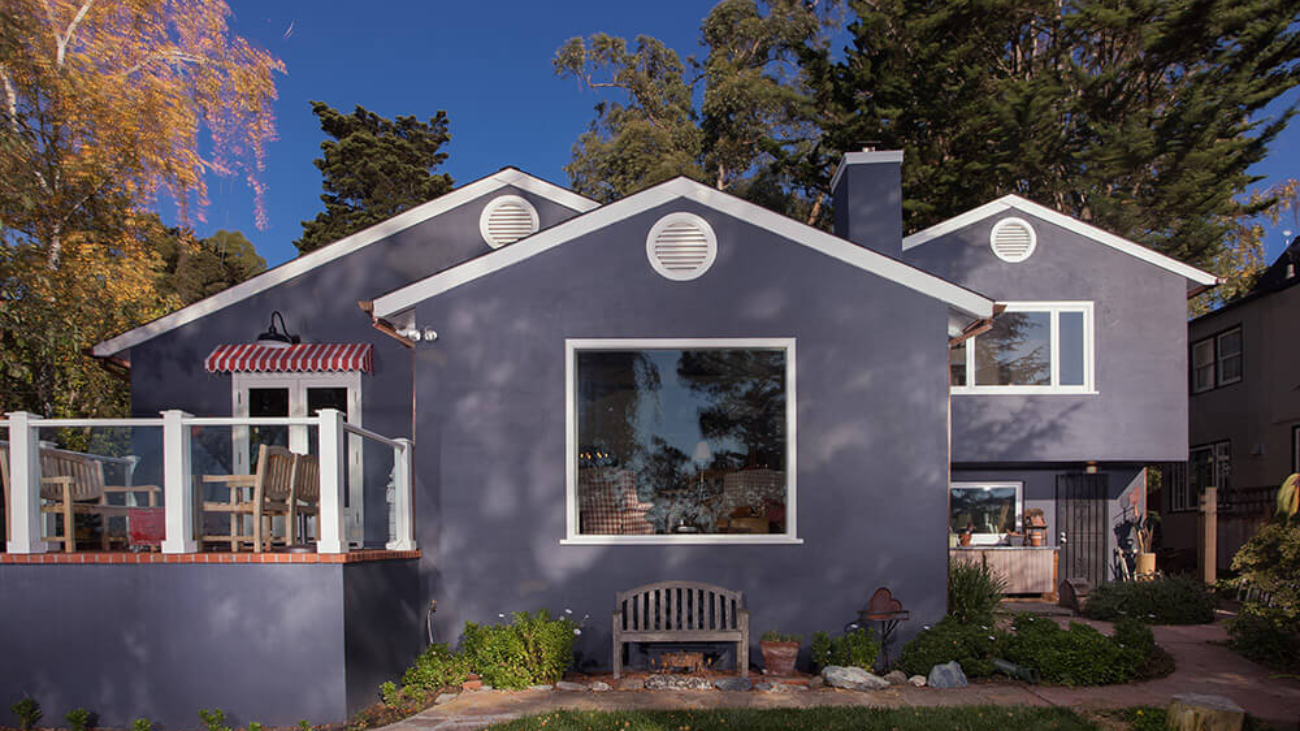
STUCCO: This home exterior material is a personal favorite of mine because it is infinitely easy to maintain — which makes it more environmentally friendly as well, in our opinion. We see in the industry a rise in the use of “sustainable” products, but if these are not also long-lasting, and must be replaced 2-to-3 times more often, then to us, that product may not in fact good for the environment. Stucco (as long as it is applied to a home NOT built on a hill near an earthquake fault) can go 10-to-20 years without needing new paint. As long as there are no cracks left unsealed, you don’t have to do much to it. Open cracks can let water in and that allows rot to develop underneath. The downside of stucco is that a whole wall of your home might be rotting away inside the stucco and you might not know about it.
Our process for maintaining, restoring, and beautifying stucco: We scrape and sand any peeling paint. For any cracks, we open them up, check for water damage underneath, and re-patch them. We spot prime and only if necessary, fully prime the whole house. If your house has a pre-colored stucco that is being painted for the first time, we can expect that a lot of primer will be needed, as unpainted stucco gets “thirsty,” drying out as it ages.
Let’s talk about elastomeric (“terpolymer” paint) on stucco: While we understand that it has some desirable qualities, as it is useful for waterproofing or bridging small cracks, it is only effective under the right conditions. If your stucco is in bad shape, and/or if you already have years of paint build-up, elastomeric is not the right choice. It cannot replace necessary repairs and upkeep. And please do not rely on elastomeric to solve all of your waterproofing problems! Elastomeric is best used on new stucco. If used on previously painted stucco, it is important not to over-apply it; results may vary depending on the texture of the stucco. Our advice is to research very carefully before you choose this product.
SHINGLES: Cedar shingles are not the most common material, but you will see them on homes across the Bay Area. Cedar is an amazing and versatile wood product, but it can become susceptible to breakdown in a shingle format. Varying approaches may be taken on how to treat them.
New shingles: Some homeowners choose to let the shingles stay raw and cure in the sun, causing them to turn gray. While this is a viable approach, we recommend at least that you have a clear sealer with a UV protectant applied to will help to protect the shingles from sun damage over the long term. This coating should be reapplied about every 5 years.
Cedar shingles that have been coated with a semi-transparent stain product: Over time, stained shingles develop tannin spots and will go grey or even totally black. To maintain a specific color and appearance we recommend using a wood brightener product that can be sprayed on and then gently scrubbed into the shingles with a stiff-bristle nylon or utility brush. Scrubbing enables the product to penetrate and remove the tannin stains as well as other types of mildew and grime.
The shingles should then be rinsed with a pressure washer (professionals-only, please). Once the shingles are nice and clean, we apply our favorite stain product: Messmers. Whether clear or one of their stock colors, we highly recommend Messmers as it results in a beautiful and long-lasting finish. NOTE: It is best to hold off on repainting the painted-wood elements around the shingles until after this process is completed, as any accidental contact from the wood-brightener product can mar a newly painted surface.
Cedar shingles that have been coated with a semi-solid or solid stain product: These types of stain products can partially or fully obscure the grain pattern of the wood. These products are used to achieve a color rather than enabling a proper marriage between color and wood grain. Any stain will fade over time, but with these types of products, you may also see peeling, flaking, or scratches — that become unsightly more than anything. Again, cedar is a hardy wood that will not rot, but in a shingle format, it does tend to break down slowly over time. A good general pressure wash of semi- or solid-stained shingles and a reapplication of the stain product in a one- or two-coat process should suffice, depending on the original product used and the condition of the wood.
Painted Shingles: Yes, this is a thing and we consider it almost a last resort, or if you simply must have a fully painted shingle home. If you don’t already have painted shingles, don’t do it. The amount of maintenance painting shingles can create is unpredictable, with each shingle potentially becoming a peeling-paint mess. To prepare and repaint this type of home, we would use the same process for painted shingles as for siding (see below). Another option is to replace your cedar shingles with HardieShingle® siding which is a fiber-cement product that is gaining in popularity.
SIDING: There are different varieties of siding your home can be built with. The original redwood of the SF Bay Area, cedar, pine or Douglas fir, or vinyl, or HardiePlank® Lap Siding which is a fiber-cement product that we are seeing on newly-constructed homes. HardiePlank is a pre-colored product that can later be painted when you are ready for a change.
Our process for painted siding, as with any painted surface: Scrape and sand any loose or peeling material. On wood surfaces, rot may need to be repaired or replaced. Repairs on damage to wood siding can only be done on areas that are no bigger than 4” x 4”. For these, we scrape out the rotted wood, apply a liquid that kills the dry rot organism, and then apply a two-part resin product that fills in the gap. We then apply a full coat of primer to those repairs and to the whole exterior of the home as needed. Next, we go over the entire surface area to inspect and caulk open gaps, in order to create a paintable surface.
BRICK: Brick homes are rarer in earthquake-prone California, but they are here, and we do work on them. Oftentimes bricks can absorb dirt and accumulate mold and mildew which can make them look drab. We recommend a careful pressure wash and scrub to brighten the bricks. Like any concrete or stone product, brick can erode over time and lose its shape. We recommend a clear sealer to prevent this. One that we use is Drylock. If you are going to go DIY with this product, please be sure to get it in a flat finish because shiny is no bueno on bricks!
Don’t you just love it when after a long day of work, just as you pull up the corner, you see your house gleaming in the sun for all to see? It’s the bright spot of the neighborhood and actually one reason why the area you live in is highly sought after. Over the years though, you’ve been busy at work and raising a family. The elements have been right there with you getting busy as well.
As an effect of the elements doing what they do best, your house has lost some its sheen and developed issues here and there, whether with the roofing, siding or water leakages. It’s time to get your house back to its former glory, but where to start?
With an exquisite paint job, of course. A properly done paint job is sure to rejuvenate the house, as well save you some serious amounts of cash. Hiring a professional painter will cost anywhere between $1,000 to $5,000. If you want an exquisite job, it is generally recommended to get an expert.
However, you can save on that cash and do the painting yourself. However, this will require serious effort from you and your collaborators, and the job can take anywhere from one to two weeks. And this could actually work to your advantage; a paint job usually lasts several years before a new coat is required.
With that in mind, what rules should you follow when repainting your house?
Be real.
It may be tempting to pick up the tools and do the job yourself and save yourself some serious dough. Have you considered this though, do you have the skills, the time and the patience to deliver the quality job you are looking for?
Painting a house by yourself, or even in the company of friends or family, is a very tedious job that requires copious amounts of time. If you neither have the skills nor the time, consider hiring a professional.
Quality matters… a lot!
You literally get what you pay for. That paint you were thinking about was a lot for very little money but ask yourself this, how long will it last until you need to repaint the house? A quality product will push you several years before you even think about painting again.
These quality paints and primers will usually cost anywhere from $35 to $70, but the quality and years of service you get will be unparalleled in comparison to some of the cheaper paints.
Be sure to check the type of paints you want to use.
Although it was the norm several decades ago due to their durability, lead paints have been found to be a health hazard to both children and adults. As the paint gets older, the flakes and dust from the paints could cause various degrees of lead poisoning.
If the house you currently reside in has paint residue from before 1978, it is recommended that you contact lead paint removal experts before embarking on a fresh painting session.
Temperate weather is the best.
Well, the elements have a say in how well your paint will age, how long it will last before wear and tear make you get a new coat. They also have a say in what time of year you should paint if you want to get good results. Yes, really. Here’s how…
The paint you are using is essentially a combination of chemical elements. Every element is affected in one way or another by temperature. When the temperatures are too high, or you’re painting in direct sunlight, the paint will dry too quickly. Painting when it’s too cold will cause the paint to not adhere to surfaces properly.
The best times to repaint the house are when the temperatures are between 50 to 90 degrees. And this should also be done when there’s no precipitation forecasted. Painting over a damp or dewy surface will cause the coat to develop bubbles.
Lay the groundwork.
Before going out to paint, ensure the surface you want to paint has been prepared for the new coat. This will mean removing the old coat of paint. You can start by using a scraper to remove old, flaky paint. The next step will be to wash the surface with soapy water and scrub with a brush. Wherever possible, use a pressure washer to blast the surfaces clean.
If you’re facing tougher paint, you can use power sander to get a smooth surface. The idea is not to remove all the paint, just to get a smooth surface which the new coat can adhere to.
Protect what’s not to be painted.
Before getting down to business, if you have furniture, plants or other fixtures around the surface you want to paint, you will either need to move them or cover them. As you go around the surface you are painting, there will always be sprays and splatters that land on surfaces you never intended to paint.
Tools make work easier.
The right tools anyway. Consider the surface you are painting on and the effort and quality you want. That’s the first step to determining which tools you will use. You may need to use a roller, or a high-quality brush, or an airless sprayer.
No shortcuts please.
If you want your house to look as amazing as it once was, or as you imagine it in your head, there is no room for shortcuts. This means applying all the necessary coats of paint to get the finish that you want. If you’re painting over a bare metal or wooden surface, you will need to use a high-quality primer to prepare the surface for what’s to come.
Do your homework.
Even though it may look like a mundane activity, painting is nothing like that. It actually requires various specialized techniques that a proper painting novice will have no idea they exist. Before embarking on the task, do your homework on painting techniques and how to mix paints to get the effect you want.
Do some more homework.
That’s if you do decide to hire a professional. The gig economy has grown in leaps and bounds with the proliferation of the internet. Any Tom, Dick and Harry who fancies themselves a good painter will make themselves available, and you may just land on the most incompetent of them.
When choosing an Oakland painting company, ask for detailed bids and most importantly, the contacts of at least two satisfied customers. Call them up and if possible, arrange a visit to the premises that were painted and inspect the work for yourself.
For A Free Oakland House Painting Estimate Call 510-567-9559